HUB 05 · Guides & Buying Advice
EV Charger Wire Size and Breaker Guide
The continuous-load rule that sizes your circuit, a quick reference table, and the one call you should always make first.
We earn a commission when you buy through our Amazon links, at no extra cost to you. It never affects our rankings, and we say so when the cheaper product is the better buy. How this works.
The rule that governs all of this is short: EV charging is a continuous load, so under standard National Electrical Code practice the circuit must be sized to 125% of the charger's current. A 40-amp charger needs a 50-amp breaker and typically 6 AWG copper wire; a 48-amp charger needs a 60-amp breaker; a 32-amp charger needs a 40-amp breaker and 8 AWG copper. The table below has the common cases — and the specifics for your home must be confirmed by a licensed electrician, because we are not one.
This guide exists so you can read a quote, understand why a 48-amp charger costs more to wire than a 32-amp one, and spot a setup that looks wrong. It is not a permission slip to run your own circuit. Sizing conductors and breakers correctly is exactly the kind of thing a licensed electrician does to code, and the consequences of getting it wrong are a fire hazard. Read this to be an informed customer, not to skip the professional.
Why the 125% rule exists
The National Electrical Code treats any load that runs at its maximum for three hours or more as a continuous load. EV charging obviously qualifies — it pulls near its full current for hours at a stretch. For continuous loads, the code requires the branch circuit and its overcurrent device to be rated at 125% of that current. In plain terms: you multiply the charger's draw by 1.25 to size the breaker and wire.
Flip it around and the same rule says a breaker can only carry 80% of its rating continuously. That is why a 50-amp breaker is matched to a 40-amp charger (40 × 1.25 = 50, and 50 × 0.80 = 40). The 25% of headroom is not waste; it is the safety margin that keeps the wire and breaker from running at their limit for hours on end.
The quick reference table
Here are the common home-charging cases under standard NEC continuous-load practice. Wire gauge assumes copper conductors; the exact size for your install also depends on the wire's temperature rating, the length of the run, and local code, which is why the last column has a range for longer runs.
| Charger output | Breaker (125% rule) | Typical copper wire |
|---|---|---|
| 32 A | 40 A | 8 AWG |
| 40 A | 50 A | 6 AWG |
| 48 A | 60 A | 6 AWG (4 AWG on long runs) |
Wire gauge is not one-size-fits-all.The gauges above are typical for standard runs with copper conductors, but the correct size for your job depends on the conductor's temperature rating, the distance of the run (long runs may need a heavier gauge to limit voltage drop), whether the wire is copper or aluminum, and how it is installed. This is precisely the calculation a licensed electrician performs to code. Use the table to understand a quote, not to buy wire.
AWG, ampacity, and why the gauge matters
Wire is rated by its ampacity— the current it can carry continuously without overheating — and in the US that gauge is expressed as an AWG (American Wire Gauge) number. The counterintuitive part is that a smaller AWG number means a thicker wire: 6 AWG is heavier than 8 AWG, and 4 AWG is heavier still. Thicker wire carries more current, which is why every step up in the charger's amperage steps up the wire.
Ampacity also depends on the conductor material and the insulation's temperature rating. Copper carries more current than aluminum of the same gauge, so an aluminum run needs a heavier gauge to do the same job. The temperature rating — the 60, 75, or 90 degree Celsius column on an ampacity chart — shifts the numbers too. That is exactly why a reference table gives typical values rather than absolutes: the real figure depends on the specific conductor and how it is installed, which is a decision for your electrician.
Long runs and voltage drop
The farther the wire travels, the more voltage it loses along the way — a phenomenon called voltage drop. Over a short run from a nearby panel, the standard gauge is fine. Over a long run to a detached garage or the far side of a property, an electrician may specify a heavier gauge than the table shows to keep voltage drop in check, which is precisely why the 48-amp row above lists 4 AWG for long runs. Heavier wire over distance is also a real line item, which is the thread linking wire gauge to the install bill. If the run in question is out to a separate building, the usual answer is one generous feeder into a small sub-panel rather than a long dedicated circuit — the detached-garage guide works that case through end to end.
The NEMA 14-50 special case
A plug-in charger that connects through a NEMA 14-50 outlet is a common setup, and it comes with a fixed ceiling: a NEMA 14-50 receptacle is on a 50-amp circuit, and a plug-in EVSE using it is capped at 40 amps of output. The same continuous-load math is why — the 50-amp circuit can only carry 40 amps continuously. If you want more than 40 amps, you need a hardwired charger on a larger circuit, not a plug-in unit. If 40 amps is your target — as it is for most homes — see our best 40-amp EV chargers roundup.
This is the practical reason most portable and plug-in chargers top out at 40 amps: they are built to live on the ubiquitous 50-amp NEMA 14-50 circuit. If a plug-in unit claimed more, it would not match its own plug. For the outlet itself, see NEMA 14-50 outlets.
Dedicated circuits, GFCI, and disconnects
A few more requirements shape a code-compliant EV circuit, and they are worth knowing so a quote makes sense. The circuit must be dedicated— the charger does not share it with other loads. A receptacle-fed setup, meaning a plug-in charger on a NEMA 14-50 outlet, generally requires GFCI protection under current code. And depending on the equipment and where it is mounted, a separate disconnect may be required as well.
These are the sort of details that hinge on the exact charger and your local code, and they are settled by a licensed electrician, not by a chart on a website. If your quote includes items you do not recognize, this is usually where they come from — they are features of a properly permitted circuit, not padding.
How amperage choice flows to cost
Every step up in charger amperage steps up the breaker and the wire gauge, and heavier wire over a real distance is a meaningful part of an install bill. A 48-amp charger on a 60-amp circuit with 6 or 4 AWG copper is simply more expensive to wire than a 32-amp charger on a 40-amp circuit with 8 AWG. That is the thread connecting this guide to the installation cost guide: your amperage choice sets your wire, and your wire is real money.
So the right amperage is the one your car and panel can actually use, not the biggest number on the shelf. A charger cannot push more current than your car's onboard charger accepts, and it cannot exceed what your panel can safely supply. Paying to wire 48 amps for a car that accepts 32 buys you nothing but a bigger bill. The shortlist of units, with amperage called out, is at best home EV chargers.
The one call to make first. Before you buy a charger at a given amperage, have a licensed electrician confirm your panel can supply that circuit. It is cheaper to learn your limit before you buy than to return a 48-amp unit your service cannot feed.
Two follow-on pages for when the circuit is in. If the breaker runs warm — which on an EV circuit it will, because this is the only load in the house that draws near its rating for hours — EV charger breaker hot to touch sets out what the listing standard actually permits and when heat means a problem. And if the math on this page says your service cannot carry the circuit you want, load-managed chargers are the route that changes the calculation rather than the panel.
How to size a circuit the right way
You are not going to do the electrical work, but you can arrive at the conversation knowing exactly what should happen. Here is the order it goes in.
1. Start with the charger's continuous output
Find the charger's rated amperage — often 16, 32, 40, or 48 amps. That is the continuous load the whole circuit is built around. If the charger is adjustable, decide the amperage you will actually run.
2. Apply the 125% rule for the breaker
Multiply by 1.25 to get the minimum breaker: 32 → 40 A, 40 → 50 A, 48 → 60 A. This is standard NEC continuous-load practice, and it is why the breaker is always a size up from the charger's draw.
3. Match the wire to the breaker, the run, and the code
The typical copper gauges are in the table above, but the final size accounts for the conductor's temperature rating, the length of the run, and your local code. This is where a licensed electrician earns the fee — hand them the amperage and the run length and let them specify the wire.
4. Confirm the panel can supply it
None of this matters if your panel cannot host the circuit. Verify capacity and free slots before you commit to an amperage. If it comes down to a panel upgrade, weigh that against a lower-amperage charger — the cost math is in the installation cost guide.
Say it plainly: we compile published code practice and do the arithmetic; we are not licensed electricians and this is not an install manual. Every breaker, wire, and connection on a 240-volt circuit must be sized and made by a licensed electrician to your local code, permitted and inspected.
The gear
Recommended gear for this guide
The products this guide refers to, with prices pulled live from Amazon and dated on each card.
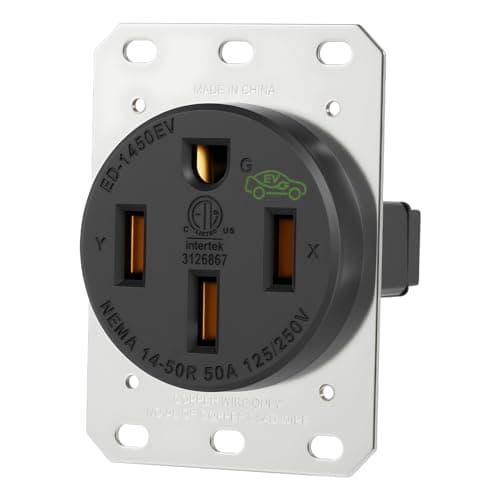
The outlet a plug-in charger needs
Industrial NEMA 14-50 Outlet
The receptacle a plug-in charger actually plugs into — buy the industrial-grade, listed version, because the cheap ones are the part that fails.
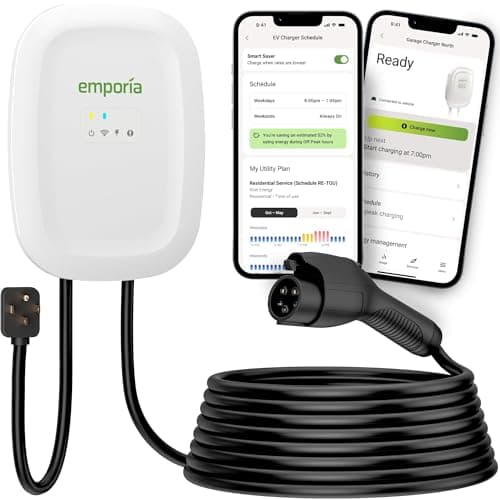
Most people who want the smart features too
Emporia Level 2 (48A)
The smart charger that does not charge a smart-charger premium — 48-amp capability and real energy monitoring for the price of a dumb one.
#ad · As an Amazon Associate we earn from qualifying purchases.
Questions
Frequently asked
What size breaker does a 40-amp EV charger need?
What wire gauge do I need for a 48-amp charger?
Why does a 40-amp charger need a 50-amp breaker instead of a 40?
Why are plug-in chargers limited to 40 amps?
Can I install the circuit and wire the charger myself?
Keep reading
Related
- NEMA 14-50 OutletsThe 50-amp receptacle a plug-in charger connects to.
- Best Home EV ChargersLevel 2 units with amperage called out so you match your circuit.
- Level 2 Installation CostHow amperage and wire run flow into the final install bill.
- Types of EV ChargersWhere the amperage limits fit into the bigger charging picture.
- EV Charger TroubleshootingWhy an undersized circuit trips a breaker, and how to spot it.
- What Amp Charger Do I Need?Choosing 32 vs 40 vs 48 amps for your car and panel.
- Can I Use a Dryer Outlet?The 14-30 vs 14-50 circuit limits, applied.
- Best EV Chargers for a 100-Amp PanelWhat to buy when the breaker you can spare is smaller than the charger you wanted.
Receipts
Sources
We do not run a testing lab, and we do not pretend to. Where a measured number came from someone else's lab, we name them and link them. Where we could not verify something, we say so on the page rather than quietly leaving it out. Read our full method.